Tonight I was baking for my coworker, Kara. She is leaving my lab for a new job and tomorrow is her last day. I wanted to do something nice for her before she left and as always I baked. I don't know anyone, who doesn't appreciate a sweet freshly baked homemade treat, so it has been always my go to. Although my blog is supposed to be about cake, I made an exception for these absolutely delightful brownies! I made them a couple of times in the past and they are a hit even with the most picky eaters. I love when I find a dessert like this one. A dessert that's very easy to make but tastes as if you slaved in the kitchen all night. It's easy to see why everyone raves about these brownies when you see the pictures.
Believe me that they taste as delicious as they look. I found the recipe on Pinterest from a fellow blogger, who came up with this genius combination. Here is a link to the recipe, her pictures and thorough instruction on how to make
The Ultimate Pretzel Crusted Peanut Butter Cup Brownies . Enjoy! And, I am off to find a new way to distract myself so I don't eat the entire batch of brownies I just made sitting on my kitchen counter.
Wednesday, May 23, 2012
Monday, May 7, 2012
Nick's Cinco de Mayo Birthday Cake
My husband Nick is turning 30 years old Monday, May 7th. Since it's a big birthday for him and it also happened that Cinco de Mayo was on a Saturday this year, we decided to have a party to celebrate. I had fun planning the cake for this fiesta. I wanted to make something simple yet colorful to fit the party theme. I came across a rainbow cake on the internet and loved how colorful and fun it looked. The recipe I found called for a white cake but I wanted to do something related to the holiday so I decided to go with a margarita cake recipe. And, for the frosting I chose lime buttercream. It's the perfect compliment to the cake. We had bought party supplies earlier in the month for the party. There were two pinatas: a cactus and a sombrero. It was my inspiration for making the cake into a sombrero with a pinata on top.
The cake didn't end up looking much like a sombrero but I still love all the fun designs. It looked very festive. The pinata on top I made earlier in the week. It is completely edible because it was made out of fondant. He, we named him Pedro, matched the colorful cake on the inside. The rainbow cake was delicious. It tasted very refreshing and everyone was really impressed by how colorful it turned out. It was really easy to make. Before baking I split equal amounts of the batter into 6 bowls. Then I dyed each one a different color. Next I put about a half a cup of batter of one color into the center of the pan followed by putting a half a cup of batter of a different color into the center of the batter already in the pan. I felt like I was doing an art project. I am really happy with the result.
In the process of looking for cake ideas online I came across the cutest idea for cupcakes. They looked like nachos. I had sometime to fit them in so I went for it. I am glad that I did because they turned out adorable. They were perfect for a Cinco de Mayo party.
Sunday, May 6, 2012
Ayla's Baptism Cake
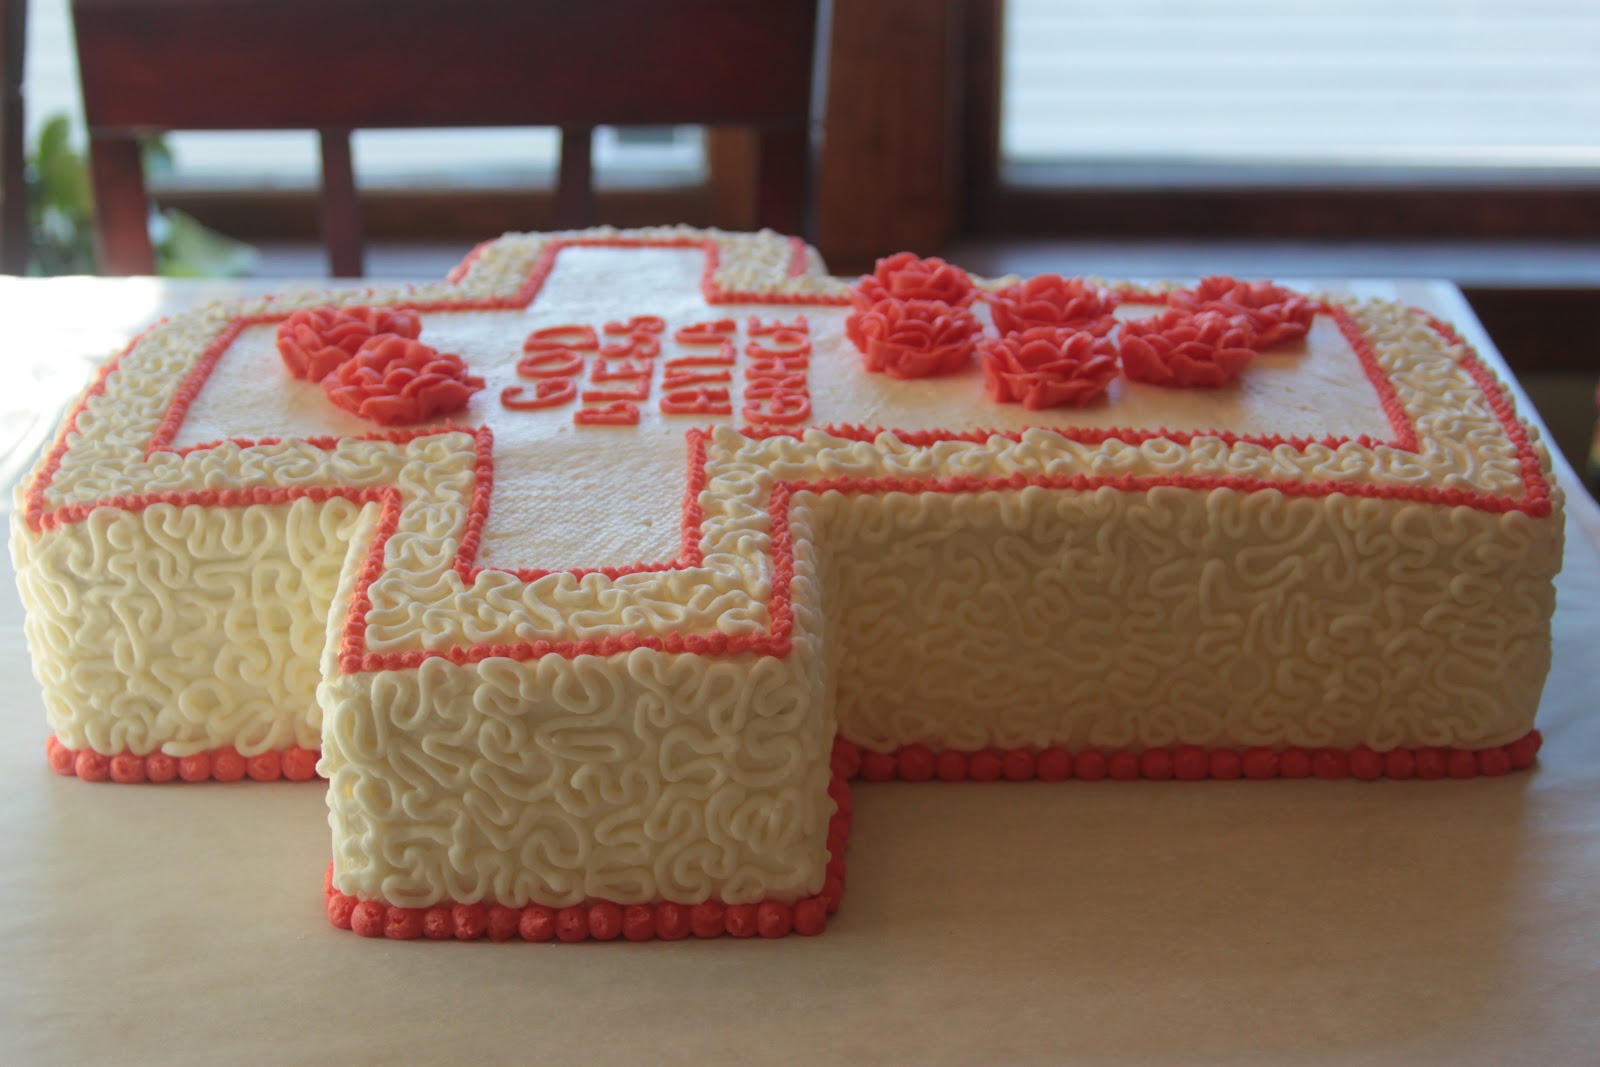
The Baby Shower Cake for Lindsey was a hit. The pictures of the cake made it around to most of my friends and coworkers. That is how I got a request from my husband's coworker, Kristy, for a Baptism cake. Her little girl, Ayla Grace, was getting baptized this past Sunday April 29,2012. Kristy looked around on the internet for Baptism cakes she liked. And, she decided on a cake in a shape of a cross with some roses and lace detail. It was a yellow cake with strawberries for a filling. To make the cross I used 6 8 by 8-inch cakes. The frosting was my favorite version of buttercream for decorating (see below for recipe). Even though I set out to make a cake that could feed a group of 20-30 people, I think the cake could feed twice that amount. Hope everyone enjoyed their generous slices of cake at the party!
Buttercream Icing Recipe
prep time: 30 min
Ingredients:
This icing is good to use for icing cakes and cookies as well as for borders and art work on cakes. It also makes a good tasting filling between layers of the cake and under a Fondant Icing. You can make roses out of Buttercream Icing, but the drying time is 3 or more days depending on the humidity.
2 sticks (1 cup) butter, room temperature
2 cups Crisco shortening
1/2 teaspoon salt
1 teaspoon butter flavoring (Wilton’s makes the best flavored version)
1 teaspoon pure vanilla extract (I use Wilton’s Clear Vanilla)
1/2 teaspoon almond extract
2 pounds powdered (confectioners') cane sugar, divided*
1 tablespoon meringue powder (optional but the texture will be smoother)** Water or milk as necessary (I usually add about 2 tablespoons but you may need more or less depending on the humidity in your neighborhood)
2 cups Crisco shortening
1/2 teaspoon salt
1 teaspoon butter flavoring (Wilton’s makes the best flavored version)
1 teaspoon pure vanilla extract (I use Wilton’s Clear Vanilla)
1/2 teaspoon almond extract
2 pounds powdered (confectioners') cane sugar, divided*
1 tablespoon meringue powder (optional but the texture will be smoother)** Water or milk as necessary (I usually add about 2 tablespoons but you may need more or less depending on the humidity in your neighborhood)
* 2 pounds un-sifted powdered sugar (confectioners' sugar) = about 8 to 9 cups.
** You can purchase meringue powder at your local grocery store under the brand name of Just Whites.
Preparation:
In the electric mixer, combine butter, Crisco shortening, and salt together to incorporate, about 5 minutes on low.
Add butter, vanilla extract, and almond extract; mix together well. Add about 1 pound (4 to 4 1/2 cups) powdered sugar and the meringue powder; mix until incorporated.
Add the remaining powdered sugar (1/2 cup of powdered sugar at a time), and mix until you get the consistency you want. You may not need to use all the powdered sugar.
Add a little water or milk (a teaspoon at a time), if necessary to thin the frosting. Blend well on low for several minutes.
Use immediately or cover and refrigerate. NOTE: Buttercream Icing will last for weeks as long as it is well sealed.
Makes about 3 1/2 pounds of Buttercream Icing.
Monday, April 9, 2012
Lindsey's Baby Shower Cake
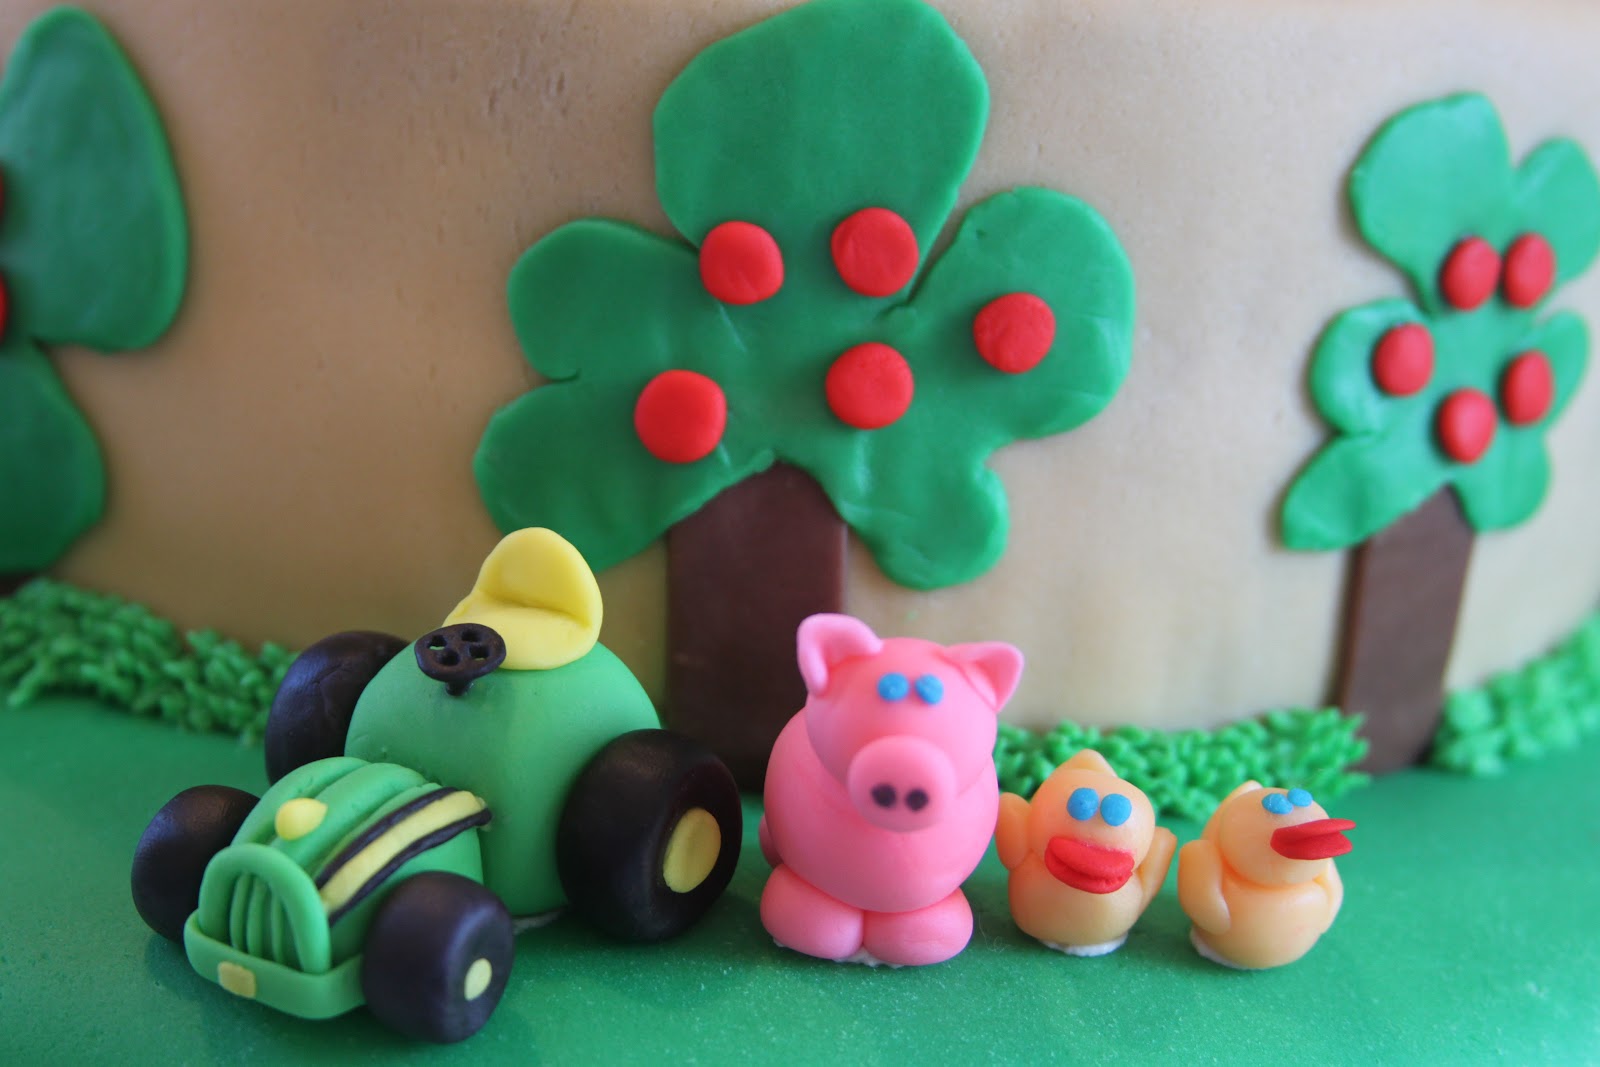
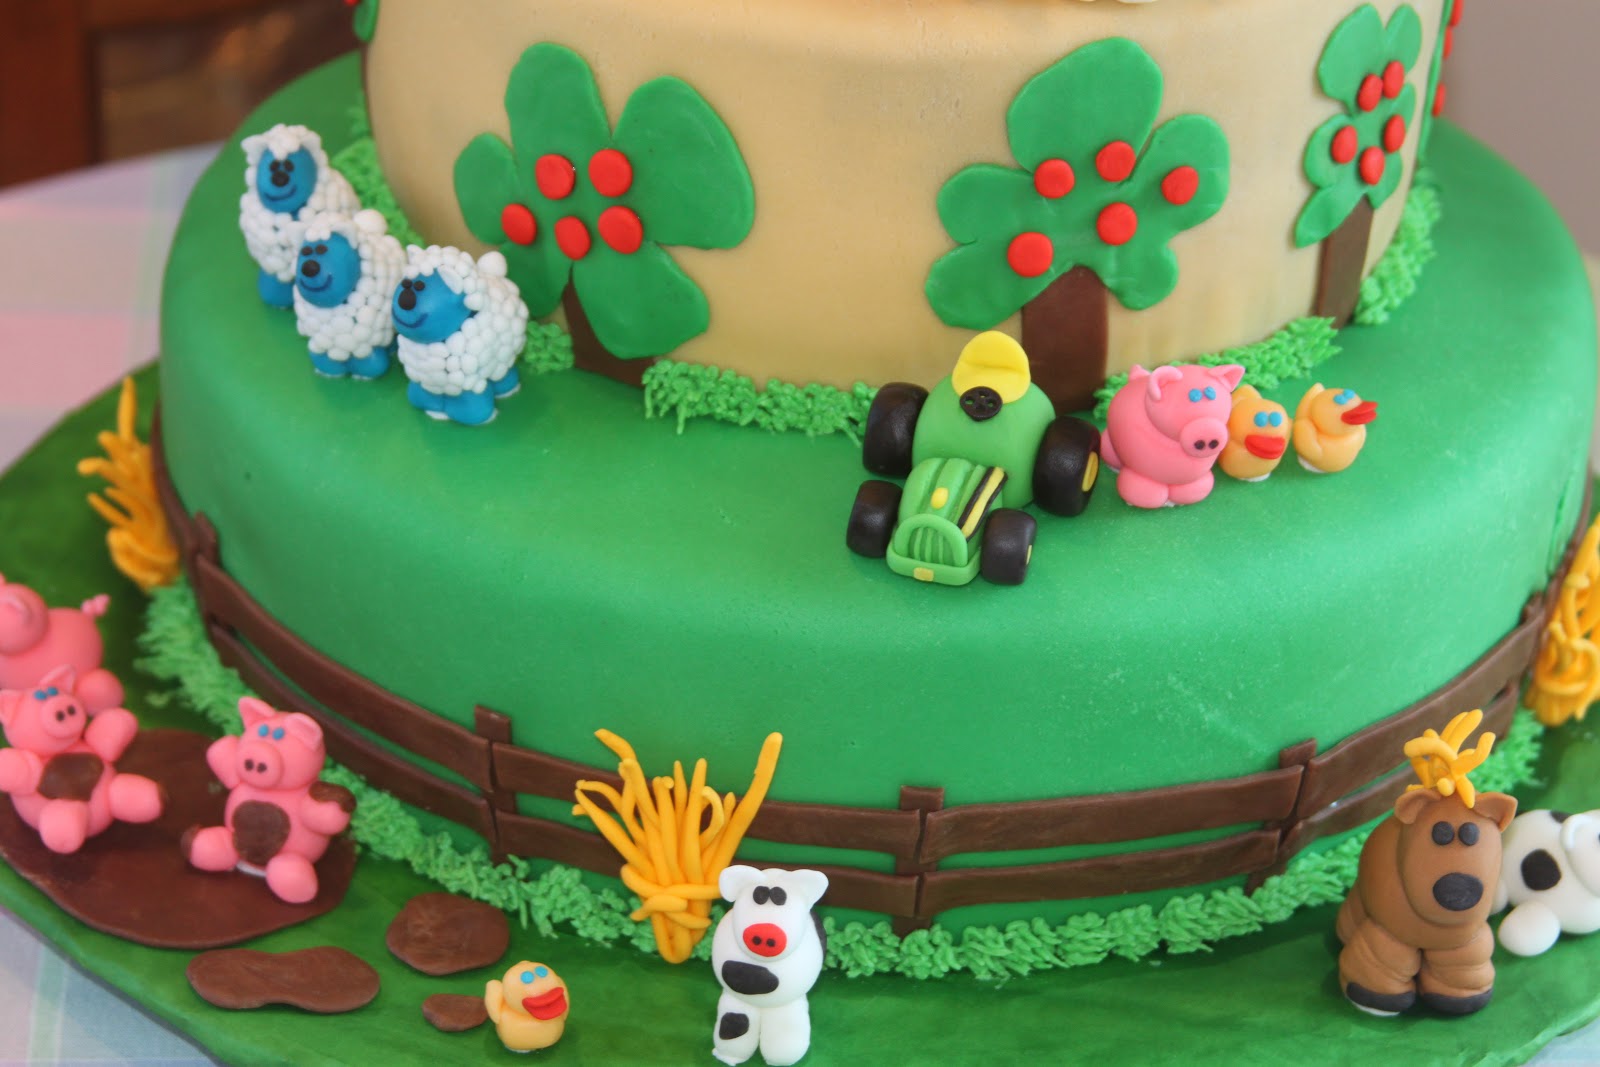
The first cake of 2012 is the baby shower cake I made for my friend, Lindsey. She is expecting her first baby in April and I was happy to attend her Baby Shower. She looked great and is ready for the little guy's arrival. Lindsey picked a farm theme for her cake. Her husbands' family owns a farm stand and apple orchard so we decided this was the perfect fit. So her sister, my friend and neighbor, Maribeth, and I came up with a design we created from images found on the web in order to make the perfect cake for Lindsey. We decided on a three tier cake (she had 50 people coming to the shower). The top 6 inch blue layer will have a red barn, the middle 9 inch yellow layer will have apple trees and finally the bottom 12 inch green layer will have a fence and haystacks. The cake will also have farm animals and a truck around it, which will complete the look. This also happens to be my first blog entry for 2012 and I hope it's not my last since I have been trying to get blogging unsuccessfully for a while.
To keep myself on track, I started out by creating a sketch of the cake. I felt less stressed because I had a plan which I could rely on. I began with making the decorations going on and around the cake. These little guys need time to dry so all the parts can bond together. I decided based on the size of the cake to go with three cows, one horse, three sheep, one dog, five haystacks, one truck, three pigs and five ducks. Since I was rusty it took me a while to make all the animals but when finally finished they came out super.
They are all made of fondant (I like to think of this stuff as edible play dough for adults), the details are drawn on using edible marker and they are totally safe to eat! Throughout the process of making these little guys you can't help but bond a little with your work. So you pick favorites and it somehow feels wrong but I always end up having one. This time it was the dog. Maybe because it was my first or maybe it was because he came out so cute.
Having three tiers is very helpful when deciding between cake and frosting flavors. It eliminates choosing vanilla over chocolate or vice versa since you can make both! The two top tiers were chocolate and the bottom layer was going to be vanilla. After doing some browsing on the web, I changed my mind at the last minute and decided to make the bottom layer a strawberry shortcake. I salivated at a recipe I found on a blog. The blogger made a recipe from a new cookbook by the Pioneer Woman and after looking at the pictures she posted of the cake I was sold! I also thought it would be a perfect recipe to get into the spirit of spring. It was an abnormally warm week here in the Northeast and it inspired me to make a cake that helped people enjoy the warm weather.
After baking the cakes, I frosted them and then covered each layer with fondant. Next I added the barn, the clouds, the trees, the apples and the fence to each tier. It is always easier to put the cake together on site, so we transported the layers separately. Once the layers were stacked and the final touches were added we were finally ready to eat the cake!!
Unfortunately, I did not take any pictures of the cake after it was cut. So I cannot post any images of the scrumptious chocolate layer covered in chocolate buttercream or the refreshing strawberry shortcake covered in vanilla buttercream. Although, without a doubt I will be making both recipes again and will be posting pictures in the very near future.
It took me about 20 hours to complete this cake including all the time I spent during the week making the farm animals. In the future, I hope to cut that time down to about 10 hours. I am on a constant look out for shortcuts and ideas to help cut down on the time. I think my best bet is to practice making the cakes and working with fondant more. My goal is to take on new projects every week or two to help hone my skills. Why Not??
Friday, September 2, 2011
Coming up...
I will be updating my blog soon with cakes I have made in the past. Just need sometime to figure out how to blog first ;)
Subscribe to:
Posts (Atom)